Create your first NPM package!
Maybe you are burning inside with an idea of an NPM package that could revolutionize the world? Or maybe you just want to see what it's all about? This article will be a simple tutorial on how you can get started with creating NPM packages - which I, personally, found to be a quite useful skill to have!
6 min read
·
By Niklas Molnes Hole
·
December 8, 2020

NPM, or Node Package Manager, is a software "library" where JavaScript developers can browse and find handy tools for their projects. These tools - or packages, to be more precise - could be frontend libraries (like react), a bunch of useful algorithms (like lodash), or command line tool enhancers (like chalk - actually made by a Norwegian NPM legend).
The NPM library is huge! Some developers have even created a drinking game because of this. However, where does these packages come from? And how can I create one? I am glad you asked! To answer this, we have to travel to the NPM package factory at the North Pole and gain Santa's tr... No, but seriously, how are they made?
Creating NPM packages are easier than you might think!
To start from the basics you will need a computer with Node.js installed.
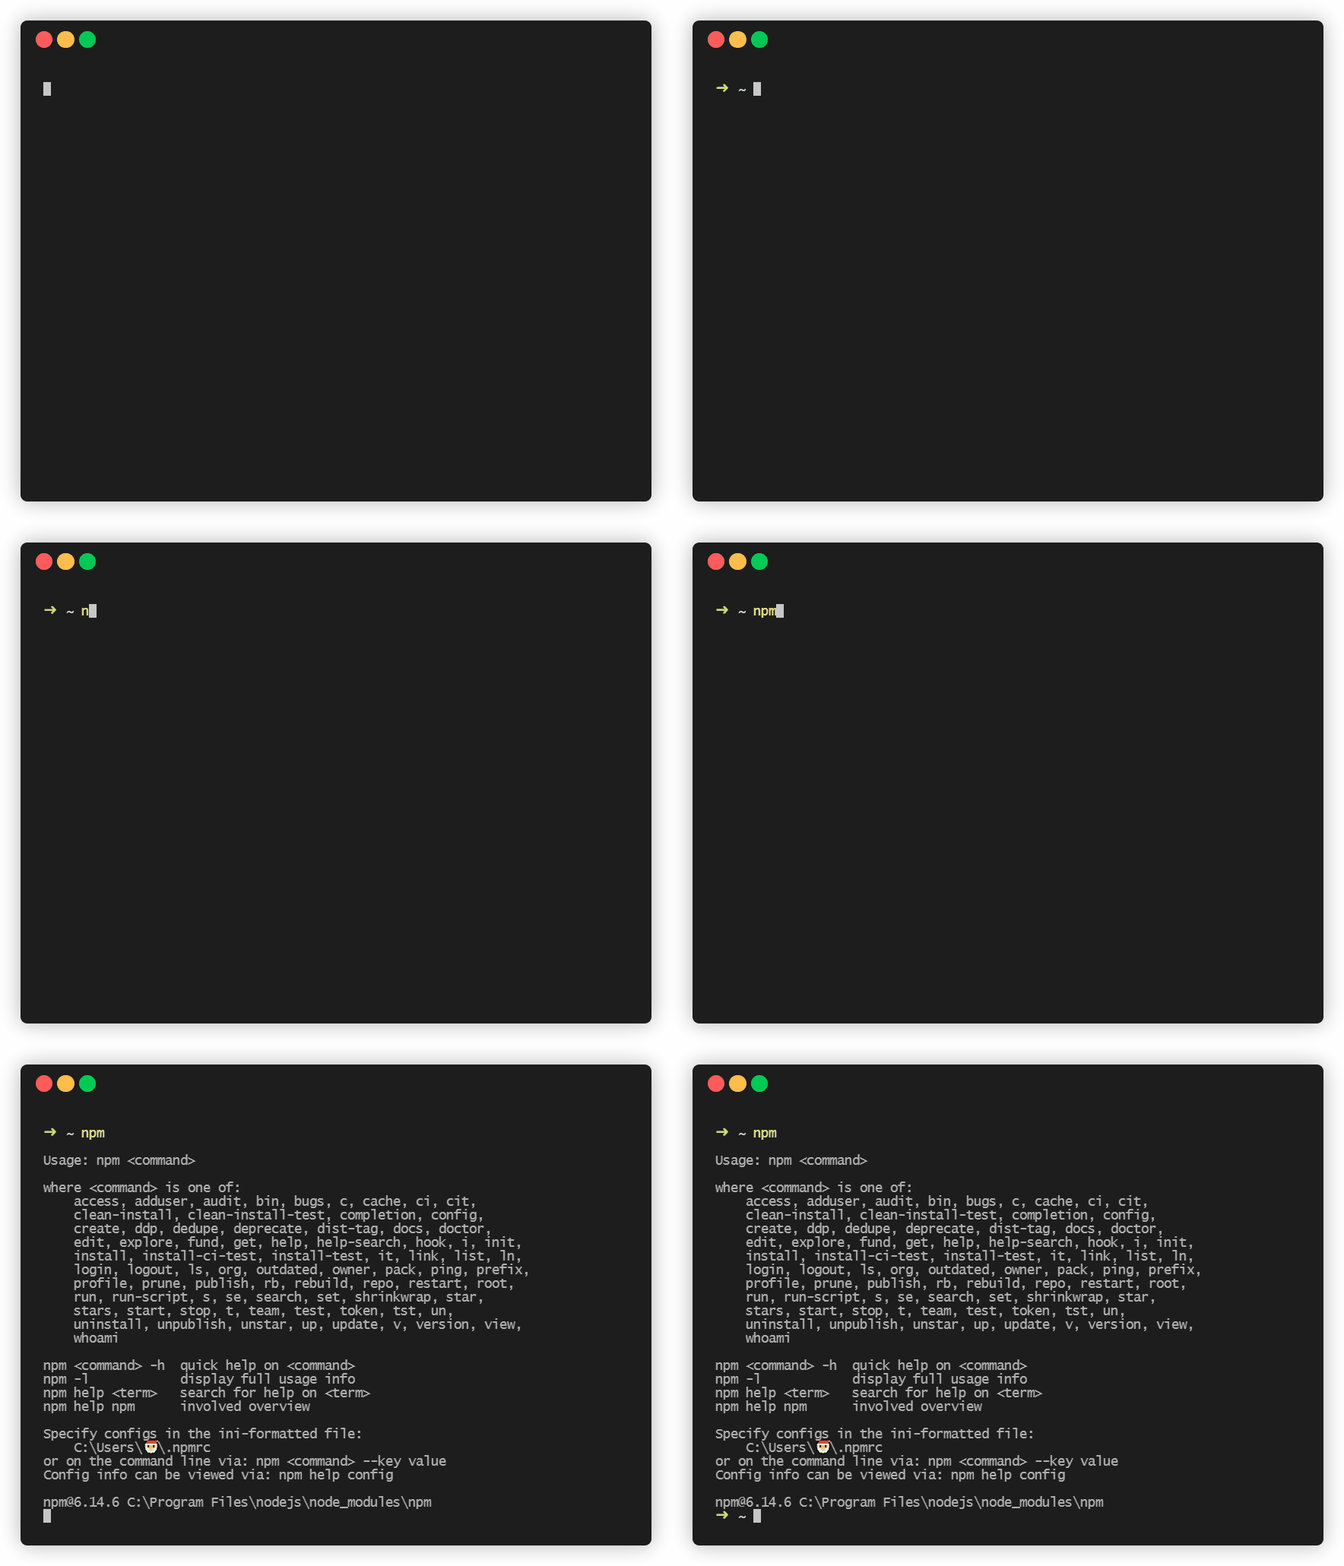
Next, you will have to make sure that when you open your terminal (3 ways to open a terminal on Windows, 7 ways to open a terminal on Mac, Linux users should already know how to do this), write npm and press Enter ↵, it does not return an error, but rather:

If this is how your terminal looks like now, then you are ready to move on. If not, you can try out this link.
Create a folder
Before we begin with using NPM, it important that you work inside a folder (or directory) on your computer that is only dedicated to your NPM package. If you don't, you can risk publishing files with sensitive information! And we don't want sensitive information publicly on the Internet, do we?
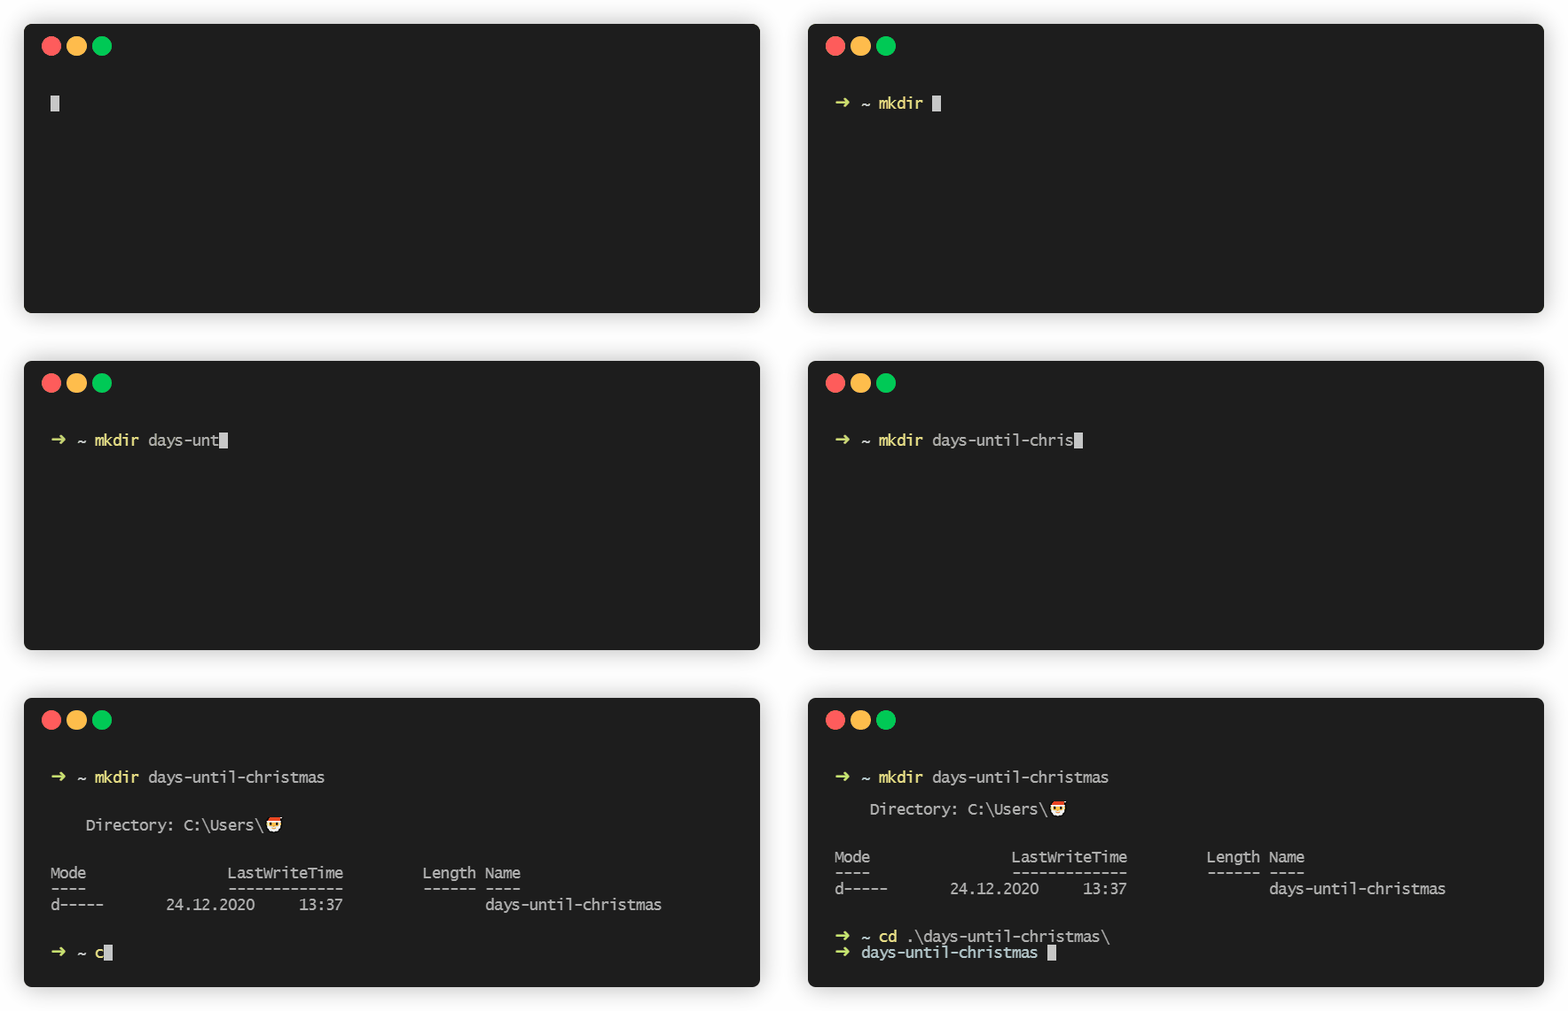
As we have already opened our terminal from the previous step, we can easily create a folder just by typing in these commands:

Create or generate a package.json file
In every NPM project, there exists a file called package.json:
{
  "name": "days-until-christmas",
  "version": "0.0.1",
  "description": "I lost the count so I made this to keep myself up-to-date next time",
  "main": "index.js",
  "scripts": {},
  "dependencies": {},
  "keywords": [],
  "author": "🎅 <santa@javascript.christmas> (https://javascript.christmas)",
  "license": "MIT"
}
This is necessary as it first of all gives a name to your package. Secondly, it contains information about the version of the project - such that users of this package can ensure they are using the correct version. You can find information of all the configurations here.
The most important configuration to note here is the main value, which is set to index.js. index.js will now act as the entry file for the NPM package, meaning this is where you need to place your code. You can add more files later, but the entry file will always be the heart of your package and all other files needs to be connected to this file somehow.
Side note: Even though we will not be using this configuration, it is worth mentioning that you can use dependencies to include other packages into your package. This enables you to use every single one of the 1.4 million packages in your project! You should probably not include every package in your project, though, as your node_modules folder (containing your dependencies) can get quite big really fast, and some packages can introduce potential security issues. It is usually a good indication to use popular packages with few dependencies, and if that is not enough, you can use npm audit.
To make the package.json file, you get two choices:
- Create a file with that name in your package folder. Then copy the code above into it.
- Or type
npm initinto your terminal. You will then be prompted with a few questions which results in a generatedpackage.jsonfile.
Choose what you feel the most comfortable with.
Add some code into your index.js file
At last, you need to add some JavaScript code to your package that other projects can use. In this tutorial, we are making a package that can calculate days until Christmas.
// Content of the index.js file

function daysUntilChristmas() {
  const timeInADay = 24 * 60 * 60 * 1000;
  const now = new Date();
  const thisYear = now.getFullYear();
  let dateOfChristmas = new Date(thisYear, 11, 24).getTime();
  if (dateOfChristmas < now - timeInADay) {
    dateOfChristmas = new Date(thisYear + 1, 11, 24).getTime();
  }
  return Math.abs(Math.ceil((dateOfChristmas - now) / timeInADay));
}

module.exports = daysUntilChristmas;
The last line will make the function daysUntilChristmas accessible by those who want to use your package. Be sure to remember to include this!
Publishing your package to NPM
When you are ready to test your package, or actually release it, you will need to go through these steps:
1. Create a user on NPM and log in
If you do not have an NPM user - like most humans - you will need to sign up on the NPM website.
Back in the terminal, you will now need to run:
npm login Now, just follow the instructions.
2. Set your package version
Before every release you will need to change your package version as it is not possible to overwrite a existing published version. However, changing a version is fairly simple. Just manually type this in your terminal:
npm version 0.0.1 You can also just change the version in package.json manually.
3. Publish your package!
This is the last step:
npm publish And tadaa! You will soon be able to see your package on https://www.npmjs.com/package/\<your-package> (you might also get some seconds of fame on the NPM frontpage 🤩), as well as adding it to your next project using npm install --save <your-package> or yarn add <your-package>. If you do not want your project to be publicly visible you can read about how it is done here and here.
Here is also a demo of the days-until-christmas package from the example which could be worth checking out:
The source code can be found here: https://github.com/niklasmh/days-until-christmas
Be also sure to check out the articles linked at the bottom if you want to dive deeper into the NPM world. There is so much you can do, and this article only scratched the tip of the iceberg.
What to do now
Now, you have few more things you can do in your future life:
- Use your NPM package to revolutionize the world, or at least the developer world. You can also read about how it can revolutionize you, as well.
- Shrink your monolith of a project into something smaller and easier to work with by moving some of your code into NPM packages. Within reasonable bounds, of course. Too many NPM packages could be a nightmare to maintain too.
- Contribute to other NPM packages. I can really recommend this! #hacktoberfest
- Copy your NPM package onto a USB stick and give it as a gift to your family and friends. I am sure they would appreciate it!
Thanks for reading! I hope you have created a wishlist, cause I already know what packages I want for Christmas 😏🎅
Up next...
Loading…
Loading…
Loading…
Loading…